In our daily lives, our thinking is multitasking, but many tasks often go unnoticed. For instance, I might walk while listening to music and using my smartphone, which involves three concurrent tasks. While it seems I can consciously control all these tasks – like pausing the smartphone while crossing the street – there are underlying processes that I cannot control. When a sudden stimulus, such as an attractive person, triggers physiological responses like a racing heartbeat or rapid breathing, I can't entirely govern these reactions. While self-discipline might help restrain some responses, certain background processes like digestion and blood circulation remain beyond my control.
Contemporary operating systems, much like humans, possess multitasking capabilities. They can run numerous applications simultaneously, and each active program at a given time is a "process." Operating systems, similar to human control, can partially or completely govern some processes, while others are beyond control.
Just like human thoughts, Linux processes never truly halt; there's a constant stream of processes, large and small, running at all times. In the realm of multitasking operating systems (such as Linux/Windows), processes theoretically can't be entirely shut down – there's always some process running.
Generally defined, any running (unfinished) program, including system daemons or user-entered commands, qualifies as a process. Processes generated from commands within a user's logged-in shell are referred to as "jobs." Barring shutdown or a sleep state like Suspend to RAM, processes cannot come to a complete halt.
Processes generated from commands within a user's logged-in shell are referred to as "jobs."
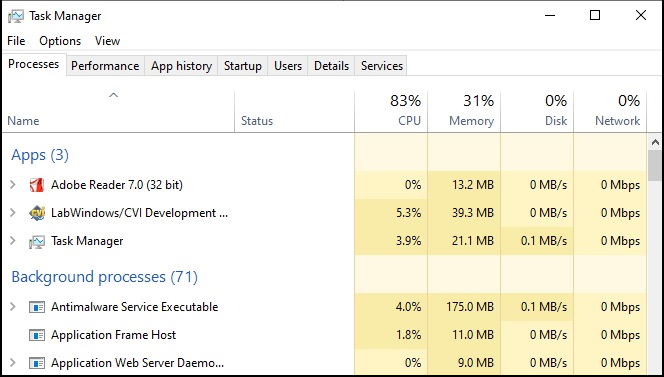
Let's take the familiar example of Windows: The screenshot below shows the input of "taskmgr" in the Windows text interface, which executes the "Task Manager." Under the "Applications" column, the user's jobs are listed.
Windows Task Manager:
| $ dd if=/dev/zero of=1g-file bs=1G count=1; seq 1 1000000 |
In the above example, running dd to generate a 1GB file takes time, and only after it completes does the seq command run. The drawback of foreground programs is the necessity to wait for a program to finish before executing the next command.
However, despite Linux being a multitasking operating system, forcing every program to wait until completion before moving to the next instruction would negate its multitasking capabilities. Certain time-consuming programs can be run in the background.
| $ seq 1 1000000 1 2 3 4 Ctrl+C ←ress <Ctrl+C> to terminate the foreground program $ |
| $ seq 1 1000000 1 2 3 4 Ctrl+Z ← Press <Ctrl+Z> to pause the foreground program [1]+ Stopped seq 1 100000000 ←The program has been stopped $ mv fileA fileB ←(Insert another command) $ fg ←Resume the paused job 5 6 7 . . . |
| $ dd if=/dev/zero of=1g-file bs=1G count=1 & ←Put dd in the background [1] 2680 ←The job number is [1], and the PID is 2680 $ seq 1 1000000 ←The foreground can execute other commands 1 2 3 . . . |
For different users, their job numbers operate independently. Multiple logged-in accounts might have jobs with the same job number, but they remain separate. The job number corresponds to the order of execution within the shell for each user.
Example:| $ dd if=/dev/zero of=1g-image bs=1G count=1 & ←← Generate a 1GB file in the background [1] 2680 ←job number [1], PID 2680 $ sleep 60 & ←Pause the entire shell for 60 seconds in the background [2] 2681 ←Job number [2], PID 2681 $ su ←Switch to superuser # updatedb & ←Run "updatedb" in the background as superuser [1] 2725 ←ob number [1] (but this is for the superuser) |
For placing multiple commands in the background and writing them on the same line, replace the semicolon ";" with an ampersand "&".
Example:| $ dd if=/dev/zero of=1g-image bs=1G count=1 & sleep 60 & ↵ Enter ←Place multiple commands in the background [1] 2680 [2] 2681 |
Although putting programs in the background facilitates multitasking, the background program's standard output or standard error might interfere with foreground programs. In such cases, you can redirect the background program's standard output or standard error to a file.
Example:| $ seq 1 10000 > count.txt & ←Redirect the background program's standard output to a file [1] 2680 $ cp -r /etc /tmp 1> /dev/null 2>&1 & ←Redirect the background program's standard output and standard error to a file [2] 2681 |
| $ sleep 600 & [1] 2680 $ dd if=/dev/zero of=1g-file bs=1G count=1& [2] 2681 $ seq 1 1000000 1 2 3 Ctrl+Z ← Press <Ctrl+Z> to pause the command "seq 1 1000000" [3]+ Stopped seq 1 100000000 $ jobs ←Display background jobs [1] Running sleep 600 & ←ob number inside square brackets [ ] [2]- dd if=/dev/zero of=1g-file bs=1G count=1 & ←he second-to-last job has a "-" [3]+ Stopped seq 1 1000000 ←The last job has a "+" |
| Symbol | Description |
| "%+" or "+" or " %%" | Last job |
| "%-" or "-" | Second-to-last job |
| "%#" (# is the job number) | Specified job number |
| "%CMD" (CMD is the command name) | Specified by command name |
| "%?STRING" (STRING is a string) | Specified by contained string |
| $ fg %- ←Bring the second-to-last job to the foreground $ fg %4 ←Bring the job with job number 4 to the foreground $ kill %cp ←Terminate jobs starting with "cp" (e.g., cpp or cp) $ bg %?100 ←Put the job containing "100" in the background to continue execution (e.g., sleep 10000) $ jobs -s -l ←List paused jobs along with their PIDs |
| $ seq 1 1000000 1 2 3 CTRL+Z ←Press <CTRLl+Z> to pause the foreground program [1]+ Stopped seq 1 100000000 ←The current program is paused $ bg ← Resume the paused program and let it run in the background 4 5 . . . |
Since the job is running in the background, you can't use <CTRL-Z> or <CTRL-C> to pause or terminate it.
Example:| $ bg %3 ←Bring job number 3 to the background to continue running |
| $ seq 1 1000000 1 2 3 CTRL+Z ←Press <CTRLl+Z> to pause the foreground program [1]+ Stopped seq 1 100000000 ←The current program is paused $ fg ←Resume the paused program and bring it to the foreground 5 6 . . . $ fg + ←Bring the last job to the foreground $ fg ←Same as above $ fg %5 ←Bring the command with job number 5 to the foreground $ fg %gzip ← Bring the `gzip` command to the foreground |
For instance, pressing <CTRL-C> sends a signal called "SIGINT" to a process. When the operating system detects this signal, it interrupts the normal control flow of the process and handles it based on the process's defined exception handling for "SIGINT." In most cases, a process receiving "SIGINT" will be terminated forcefully by the operating system.
The kill command is used to send signals to processes, telling the operating system to handle a particular event. Most often, this results in terminating the process. However, the functionality of kill extends beyond this. By using kill -l (lowercase "L"), you can list the available types of signals.
Example:| $ kill -l ←List all signal numbers 1) SIGHUP 2) SIGINT 3) SIGQUIT 4) SIGILL 5) SIGTRAP 6) SIGABRT 7) SIGBUS 8) SIGFPE 9) SIGKILL 10) SIGUSR1 11) SIGSEGV 12) SIGUSR2 13) SIGPIPE 14) SIGALRM 15) SIGTERM 16) SIGSTKFLT 17) SIGCHLD 18) SIGCONT 19) SIGSTOP 20) SIGTSTP 21) SIGTTIN 22) SIGTTOU 23) SIGURG 24) SIGXCPU 以下略 |
While kill can send various signals to processes, the way different processes handle these signals varies. If a process receives a signal that it hasn't defined a specific response for, the operating system's behavior may differ. In some cases, the process might be terminated, while in others, it might be ignored. However, signals like "SIGKILL" and "SIGSTOP" cannot be ignored. Processes receiving "SIGKILL" must be terminated, while those receiving "SIGSTOP" are effectively frozen and cannot execute.
The basic usage of the kill command involves the "-s" option followed by a signal. In cases where a process cannot be terminated, you can use kill -s SIGKILL to terminate it without any mercy. You can also use the numerical values listed by kill -l to replace the signal names. For instance, kill -s SIGKILL is equivalent to kill -9.
Example:| $ seq 1000000000 > /dev/null & ←Generate a background process [1] 21533 $ kill -s SIGINT %+1 ← Send a "SIGINT" signal to the background process (equivalent to kill -s SIGINT or kill -2) [1]+ Interrupt seq 1000000000 > /dev/null ←he background process is interrupted $ seq 1 1000000 ←Output 1 ~ 1000000 1 2 3 CTRL+Z ←Press <CTRLl+Z> to pause the program $ kill -s SIGCONT %+1 ← Send a "SIGCONT" (continue) signal to the paused program 4 ←Output continues 5 6 . . . |
| $ kill -s SIGKILL %2 ← Kill job number 2 $ kill -9 1234 ←Kill process with PID 1234 |
| Value | SIGNAL Name | Explanation |
| 2 | SIGINT | Terminate the program, equivalent to pressing <CTRL-C>, so any command interruptible by CTRL-C can be terminated using this Signal. |
| 3 | SIGQUIT | Similar to pressing <CTRL-> to terminate the program. |
| 9 | SIGKILL | Forcefully terminate the process. |
| 15 | SIGTERM | This is the default value. When a process receives this Signal, it usually saves necessary data and shuts down. The default method for shutting down processes during system shutdown is to use this value. If unsuccessful, (9)SIGKILL may be used. |
| 17 | SIGCHLD | Notify the parent process that a child process has terminated |
| 18 | SIGCONT | Resume the action that was paused by Signal (19)SIGSTOP or (2)SIGTSTP. |
| 19 | SIGSTOP | Temporarily pause the process. It can be resumed later using Signal (18)SIGCONT. Unlike (20)SIGTSTP, this Signal cannot be ignored. |
| 20 | SIGTSTP | Similar to pressing <CTRL-Z>, but unlike (19)SIGSTOP, some processes may ignore this Signal. |
| $ kill -9 %3 ←Forcefully terminate job #3 $ kill -s SIGSTOP 1234 ←Pause the process with PID=1234 $ kill -s SIGCONT 1234 ←Resume the process with PID=1234s $ kill %gzip ←Terminate the job named 'gzip' |
| Generating different processes $ dd if=/dev/zero of=1g-file bs=1G count=1 & [1] 2890 $ sleep 1000& [2] 2891 $ sleep 2000& [3] 2892 $ sleep 3000& [4] 2895 $ jobs ←View the newly generated processes [1] Running dd if=/dev/zero of=1g-file bs=1G count=1 & [2] Running sleep 1000 & [3]- Running sleep 2000 & [4]+ Running sleep 3000 & $ killall sleep ←Terminate all processes with the name "sleep," sparing others [2] Terminated sleep 1000 [3]- Terminated sleep 2000 [4]+ Terminated sleep 3000 $ jobs ←Verify [1]+ Running dd if=/dev/zero of=1g-file bs=1G count=1 & |
During the runtime of Unix/Linux, any program that is currently executing and utilizing system resources, including user jobs and system daemon programs, is referred to as a process.
Given that Unix-like systems are multi-user and multi-tasking environments, processes are more intricate compared to jobs. There are specific terms related to processes that should be understood.
To determine the PPID, you can utilize the command echo $PPID, or you can employ the pstree command to visualize the process hierarchy.
Example:| $ echo $$ ←Display the PID of the current shell 2592 $ echo $PPID ←Display the PPID of the shell 2588 |
For example, to create a ".txz" tarball file, the tar command will use the xz program for compression (thus involving two processes: tar and xz). From the perspective of the tar command, it spawns a child process, which is the xz process responsible for compression. However, from the perspective of the xz program, its parent process is the tar process that initiated the compression.
| $ tar -Jcvf file.txz /etc &> /dev/null & ←Execute the tar command in the background, compressing with xz after archiving [1]14855 $ pstree -ps 14855 ←Observe the parent-child process relationship and their PIDs systemd(1)───gnome-terminal-(14248)───bash(14257)───tar(14855)───xz(14859) |
Creating a process group helps in managing processes efficiently. For instance, sending a signal to a process group using the kill command will affect all processes within that group. The ps command is commonly used to identify the pgid.
Exampe:| $ seq 0 100000000 | grep '[[:digit:]]' | tr '0-9' 'A-J' > /dev/null & [1] 29868 $ ps -o pid,pgid,comm ← Observe pid & pgid PID PGID COMMAND 2564 2564 bash 29866 29866 seq 29867 29866 grep 29868 29866 tr 29874 29874 ps $ kill -SIGTERM -29866 ← The preceding "-" indicates the target is "pgid" |
If a process is not part of a pipeline, its PID is also equal to its PGID, and it leads itself.
A session is itself a process, typically the login shell, and its unique identifier is called the "session ID" or "SID." Any processes generated by the same user after logging in share the same SID. The ps command can be used to identify the SID.
Example:| $ sleep 1000 & [1] 2847 $ seq 0 100000000 | tr '0-9' 'A-J' > /dev/null & [2] 2849 $ ps -o pid,sid,comm ←Observe pid & sid (Should be the same if not logged out) PID SID COMMAND 2711 2711 bash 2847 2711 sleep 2848 2711 seq 2849 2711 tr 2850 2711 ps |
Zombie processes are a theoretical issue in other operating systems as well. Hence, the urban legend that occasionally restarting devices like phones, computers, or routers can help maintain smooth operation might have some validity. (I vaguely recall that home routers can be set to restart daily at a certain time.)
Zombie processes occur when a child process abruptly terminates for various reasons, and the parent process fails to perform the necessary cleanup to recover the resources used by the child process, resulting in a "zombie."
All processes originate from init through asexual reproduction. When a process "forks," it creates a copy of itself, resulting in a child process. The "fork" name originates from the Unix system call, where using "fork( )" in a process leads to the creation of a new process, thus achieving asexual reproduction. The child process carries out different tasks, and it is given a unique PID to distinguish it from the parent process.
The simplest example of a fork in a command-line environment is executing a new shell.
Example:| $ echo $$ ← Display the PID of the current shell
2563 2563 $ bash ← Execute another shell $ echo $$ $PPID ← Display the PID and PPID of the current shell 2592 2563 ← The current PPID = "2563," which is the PID of the previous shell |
The exec command originates from the system call "exec( )", and it is used to replace an existing process with a new one. If a parent process is no longer needed after creating a child process, you can use exec to replace the parent.
| $ echo $$ $PPID ← View the PID and PPID of the current shell 2592 2563 $ chsh -l ← View available shell options /bin/csh /bin/sh /bin/bash /sbin/nologin $ exec csh ←Use "exec" to replace the current shell with a new "csh" shell (using the "exit" command won't return to the original shell) % echo $$ $PPID ← View the PID and PPID of the new "csh" shell 2592 2563 |
In Linux, a "daemon" is a special type of process that starts running in the background when the system boots up. Daemons are designed to be long-running and crucial for the proper functioning of the operating system, similar to the vital functions of a heartbeat or breathing in a human body. They continuously watch over and accompany the operating system throughout its operation.
Most daemons in Linux are related to networking services and hardware control. Traditionally, daemon processes are named with a "d" at the end to easily identify them. For example, "telnetd" or "sshd" (for remote login services) and "syslogd" (for system logging) are all daemon processes. You can use commands like pstree or ps to observe processes ending with "d" to identify most daemons.
Despite being different from typical user processes, daemons are still processes. One distinct characteristic of daemons is that their parent process is init, and they always run in the background, remaining active and essential for the system's operation.
| Syntax:ps [option][-option] | |||
| Command name/function/command user | option | function | |
| ps/ process status/ Any |
-a | List all processes associated with terminals (tty) except session leaders and terminal processes. | |
| a | List all processes associated with terminals (tty) or jobs, when used with the "-x" option it lists all processes, including daemons. | ||
| -A | List all processes. Similar to ps ax, but without the "STAT" column. | ||
| -f | List full-format information about processes. Similar to "-a", but with additional columns like "UID","STIME", etc. | ||
| f | Display process hierarchy using a tree-like format. Only shows processes from the same session ID as the login user. | ||
| o FORMAT | Specify the output format with specific fields, such as "pid","ppid","pgid","sid","tty","time",、"nice","comm" and more. | ||
| -t [N] | Display processes associated with a specific terminal (tty number "N"). | ||
| -u [USER] | Display processes for a specific user. | ||
| -x | but only displays processes associated with the controlling terminal. Often used with -a to show all processes. | ||
When used without any options, ps output is similar to jobs and displays processes associated with the same session ID as the user.
Example:| $ ps PID TTY TIME CMD 3627 pts/0 00:00:00 bash 3656 pts/0 00:00:00 vim 3657 pts/0 00:00:00 ps |
The ps command is used to display information about processes. In the above example, it shows the Process ID (PID), Terminal (TTY), Time, and Command (CMD) of the running processes.
Example:
| $ ps aux | grep 'Z' USER PID %CPU %MEM VSZ RSS TTY STAT START TIME COMMAND chi 3458 0.0 0.0 0 0 ? Z 00:46 0:00 [xinitrc] <defunct> chi 3459 0.0 0.0 0 0 ? Z 00:46 0:00 [xinitrc] <defunct> chi 3691 0.0 0.0 0 0 pts/0 Z 00:59 0:00 [myprog] <defunct> |
The ps aux command displays detailed information about all processes. In the example above, it is used in combination with grep to find zombie processes. Zombie processes are indicated by the "STAT" column showing "Z" (defunct).
Example:| $ ps -o pid,ppid,pgid,nice,tty,comm PID PPID PGID NI TT COMMAND 3627 3624 3627 0 pts/0 bash 3656 3627 3656 0 pts/0 vim 3727 3627 3727 0 pts/0 ps |
The ps -o command is used to customize the output format. In the above example, it specifies the columns to display, including PID, Parent PID (PPID), Process Group ID (PGID), Nice value (NI), Terminal (TTY), and Command (COMM).
Other commonly used options include:| $ ps -t 1 ←Display processes on tty1 $ ps f -u obama ←Display process tree for user "obama" |
By default, when you run top, it will continuously update real-time information every 5 seconds (with the most CPU-intensive process at the top for easy identification) until you press q to exit. top is an interactive tool, and you can perform actions such as renicing or killing processes using r or k, toggling task/CPU information with t, toggling memory information with m, and more. For a complete list of key commands, you can press h.
| $ top top - 00:42:30 up 36 days, 1:08, 2 users, load average: 0.16, 0.02, 0.01 Tasks: 130 total, 4 running, 125 sleeping, 1 stopped, 0 zombie Cpu(s): 0.2%us, 2.6%sy, 0.0%ni, 97.2%id, 0.0%wa, 0.0%hi, 0.0%si, 0.0%st Mem: 515156k total, 438756k used, 76400k free, 11520k buffers Swap: 1020088k total, 0k used, 1020088k free, 253064k cached PID USER PR NI VIRT RES SHR S %CPU %MEM TIME+ COMMAND 2295 root 20 0 32496 12m 5936 S 1.2 2.4 0:15.29 X 2571 aaa 20 0 64484 19m 10m S 0.9 3.9 0:04.20 gnome-terminal 2113 root 20 0 3388 1148 1012 S 0.2 0.2 0:00.20 hald-addon-inpu 2414 aaa 20 0 31500 3616 2940 S 0.2 0.7 0:01.01 exe ... (more processes) |
The first line is obtained from the uptime command and displays the current system time. The subsequent fields show the system's uptime, such as "36 days, 1:08" (indicating the system has been running without a crash for 36 days, 1 hour, and 8 minutes), and the number of logged-in users, which is "2" in this case.
The last field, "load average 0.16, 0.02, 0.01," presents the system's load averages for the last 1, 5, and 15 minutes, respectively. If these values exceed 5, it may suggest a system overload.
Additionally, you can toggle the display of this line by pressing the l key (lowercase L).
| sy | System CPU time |
| ni | User time with adjusted priority (nice value) |
| id | Idle CPU time |
| wa | CPU time spent waiting for I/O operations (input/output wait) |
| hi | CPU time spent handling hardware interrupts |
| si | CPU time spent handling software interrupts |
| st | Steal time, indicating time spent by a virtual CPU while the hypervisor is servicing other virtual CPUs |
| PID | process ID |
| USER | User associated with the process |
| PR | Process priority (niceness value) |
| NI | Nice value of the process |
| VIRT | Virtual memory usage (in kilobytes) |
| RES | Resident memory usage (in kilobytes) |
| SHR | Shared memory usage (in kilobytes) |
| S | Process status D = uninterruptible sleep R = running S = sleeping T = stopped Z = zombie |
| %CPU | CPU usage percentage by the process |
| %MEM | Memory usage percentage by the process |
| TIME+ | Total CPU time used by the process (in 1/100 seconds) |
| COMMAND | Process name or command. |
| $ top -p 61,162 ←Displays processes with PID 61 and 162 onlys |
| $ top -b -o +%CPU | head ←Displays the top 3 CPU-intensive processes $ top -b -o +%MEM | head 17 > file ←Stores the top 10 memory-intensive processes in a file named "file" |
The nice command can be used to set the priority (niceness value) of a process, ranging from -20 to 19, where lower values indicate higher priority. Only the root user can set negative values. If no specific niceness value is assigned using nice, it defaults to 0. Additionally, the parent process's priority is inherited by its child processes.
To view the current niceness value, you can use the nice command without any options. You can also observe the niceness value of processes using commands like ps and top.| $ nice ←Display the current niceness value 0 ←Current value is 0 $ sleep 1000 & ←reate a background process and observe its niceness value [1] 2733 $ ps -o pid,ni,comm ←Use "ps" to check the niceness values PID NI COMMAND ←"NI" is nice priority value 2578 0 bash 2632 0 sleep 2634 0 ps |
To set the niceness value of a process, use the syntax: nice -n # COMMAND (# represents the niceness value, ranging from -20 to 19). However, only the root user can set values smaller than 0.
Example:| $ seq 90000000000 > /dev/null & ← Run two processes in the background that generate a huge number sequence $ seq 90000000000 > /dev/null & $ time tar -Jcvf file.txz /etc &> /dev/null ← Run a tarball compression process in the background and measure its execution time real 0m27.590s ← Took 27.59 seconds user 0m21.163s sys 0m0.187s $ time nice -n 5 tar -Jcvf file.txz /etc &> /dev/null ←ncrease the niceness value to 5 and measure the execution time real 1m24.405s ← Took 1 minute and 24.405 seconds user 0m21.529s sys 0m0.211s |
| $ renice 6 -p 2632 ←Change the niceness of PID 2632 to 6 2632: old priority 0, new priority 6 |
During times of high load, appropriately adjusting the process priority can prevent certain processes from monopolizing resources. In the following experiment, we intentionally create three endlessly running processes to consume resources and then use renice to allocate resources.
Example: (Create 3 processes to consume resources)| $ dd if=/dev/zero of=/dev/null bs=1 count=100G & [1] 2915 $ seq 0 9999999999 > /dev/null & [2] 2926 $ yes > /dev/null & [3] 2929 |
| $ top -p 2915,2926,2929 PID USER PR NI VIRT RES SHR S %CPU %MEM TIME+ COMMAND 2915 aaa 20 0 3956 552 472 R 33.0 0.1 2:34.52 dd if /dev/zero of 2929 aaa 20 0 3796 456 400 R 33.0 0.1 1:18.53 yes 2926 aaa 20 0 3800 548 488 R 32.6 0.1 1:33.64 seq 0 9999999999 |
Observing the three processes in the above example, each consumes about 33% of the CPU resources, almost completely utilizing the CPU time.
Suppose we believe that the dd process is consuming too many resources, causing other processes to be sluggish. In that case, we can use renice to decrease its priority and then observe the results:| $ renice 15 2915 2915: old priority 0, new priority 15 $ top -p 2915,2926,2929 PID USER PR NI VIRT RES SHR S %CPU %MEM TIME+ COMMAND 2926 aaa 20 0 3800 548 488 R 45.3 0.1 12:16.22 seq 0 9999999999 2929 aaa 20 0 3796 456 400 R 45.3 0.1 12:01.15 yes 2915 aaa 35 15 3956 552 472 R 1.7 0.1 8:07.17 dd if /dev/zero of |
| $ mkfifo MyPipe ←Create a named pipe called "MyPipe" $ ls -l MyPipe ←Verify using ls prw-rw-r-- 1 aaa aaa 0 2015-03-20 15:23 MyPipe ←The leading 'p' indicates a named pipe $ file MyPipe ←Verify using file MyPipe: fifo (named pipe) |
In Unix-like systems, the philosophy is that "everything is a file," and this includes the FIFO data type. However, it's important to note that the size of a FIFO file is always 0, as it doesn't occupy physical disk space.
How can we use this FIFO "file"? The following example demonstrates a simple use case, using a named pipe to transform numbers into letters.
Example (continued):| $ tr '0-9' 'a-j' < MyPipe > out.txt & ←Transform numbers to letters using the named pipe [1] 3031 $ seq 0 10 > MyPipe ←Write numbers to the named pipe [1]+ Done tr '0-9' 'a-j' < MyPipe > out.txt $ cat out.txt ←Verify the output in "out.txt" a b c d e . . . |
This example illustrates communication between different processes using a FIFO data stream, without the need for intermediate media.
Another practical example involves using named pipes as a medium for transferring compressed data:
Example (continued):| $ bzip2 -c < MyPipe > out.bz2 & ←Compress using bzip2 and write to "out.bz2" [1] 3088 $ seq 1 1000 > MyPipe ←Write numbers to the named pipe $ bzcat out.bz2 ←Verify the decompressed outpu 1 2 3 . . . |
Named pipes can be manipulated similarly to regular files and can be removed using the rm command.
Example (continued):| $ rm MyPipe |
The mkfifo command can also be used to set permissions for the named pipe file, as shown in the following example:
Example:| $ mkfifo --mode=0666 /tmp/name_pipe |
"Process substitution" is a technique that allows you to treat the output/input of different processes as if they were files. This is particularly useful when you want to compare or manipulate the output of commands in a file-like manner. One common use case is using process substitution with the diff command to compare the results of two commands, where regular file comparison wouldn't work.
The syntax for process substitution is "< (COMMAND)", and it creates a temporary named pipe to pass the output of "COMMAND" to another command as if it were a file.Note that there should be no space between "<" and "(".
Here's an example that demonstrates process substitution by comparing the uppercase versions of two files using the diff command:
Example:| $ diff <(tr a-z A-Z < file1) <(tr a-z A-Z < file2) ←Compare the uppercase versions of file1 and file2 |
| $ cat file1 | tr a-z A-Z > file1.tmp $ cat file2 | tr a-z A-Z | diff - file1.tmp $ rm file1.tmp |
In reality, process substitution uses named pipes behind the scenes to facilitate communication between different processes.
Example:| $ ls -gGl <(echo) ←Creates a named pipe (/dev/fd/63) for process substitution lr-x------ 1 64 2015-04-10 22:54 /dev/fd/63 -> pipe:[15358] $ file <(true) /dev/fd/63: broken symbolic link to `pipe:[15478]' |
In this example, the process substitution creates a named pipe ("/dev/fd/63") in the background.
Here's a more concise example to illustrate the concept:
Example:| $ diff file1 <(uniq file2) ←Compare the contents of file1 and the unique lines of file2 |